- 1 内核链表
- 1.1 内核链表结构体
- 1.2 list初始化
- 1.3 内核链表操作
- 1.3.1 插入节点
- 1.3.2 删除节点-list_del
- 1.3.3 链表删除与反初始化-list_del_init
- 1.3.4 链表遍历
- 1.3.4.0 list_entry
- 1.3.4.1 list_for_each(正向遍历)
- 1.3.4.1 list_for_each_safe
- 1.3.4.2 list_for_each_entry
- 1.3.4.2 list_for_each_entry_safe
- 1.3.4.3 list_for_each_prev(反向遍历)
- 1.3.4.3 list_for_each_prev_safe
- 1.3.4.4 list_for_each_entry_reverse
- 1.3.4.4 list_for_each_entry_safe_reverse
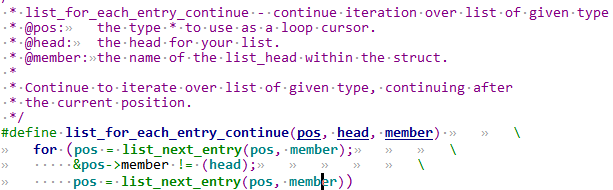
- 1.3.4.5 list_for_each_entry_continue/list_for_each_entry_from(从中间某个节点开始遍历)
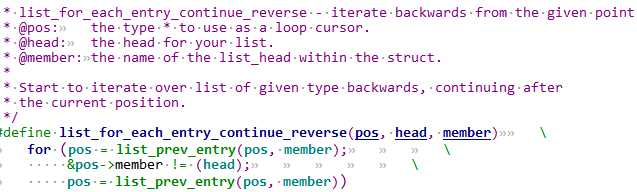
- 1.3.4.5 list_for_each_entry_continue_reverse(从中间某个节点开始反向遍历)
- 1.3.5 判段链表是否为空
- 1.3.6 判段节点是否为最后一个节点
- 1.3.7 获取第一个节点的宿主结构
- 1.3.8 获取最后一个节点的宿主结构
- 1.3.9 获取上一个节点的宿主结构
- 1.3.10 获取下一个节点的宿主结构
- 1.4 内核链表进阶操作
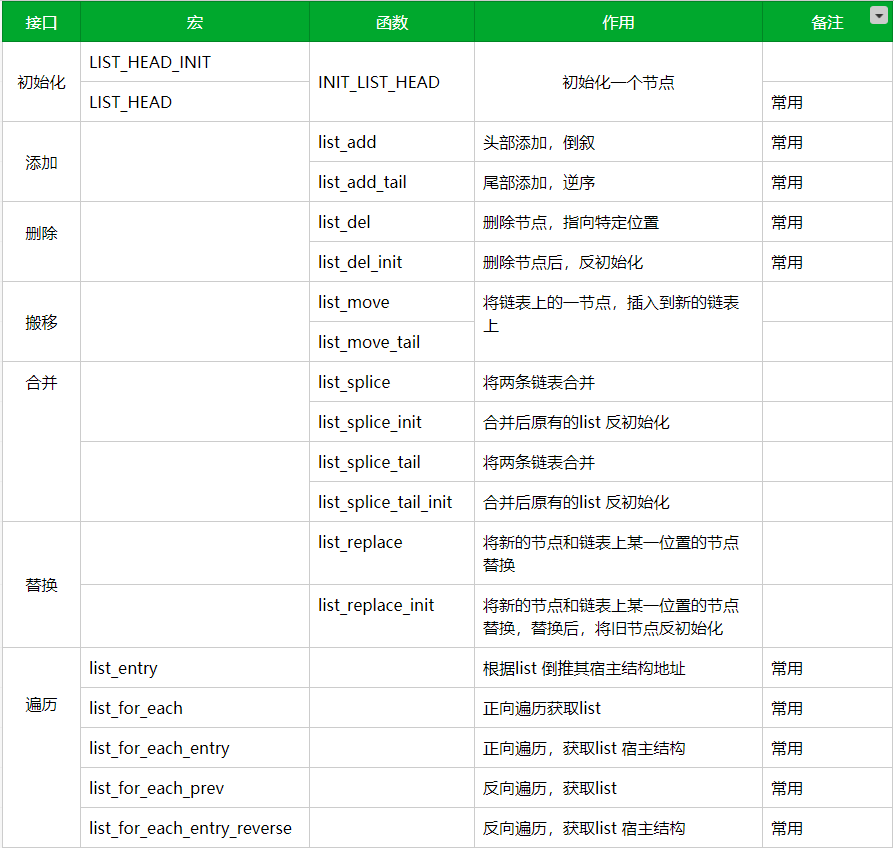
- 2 内核链表总结
1 内核链表#
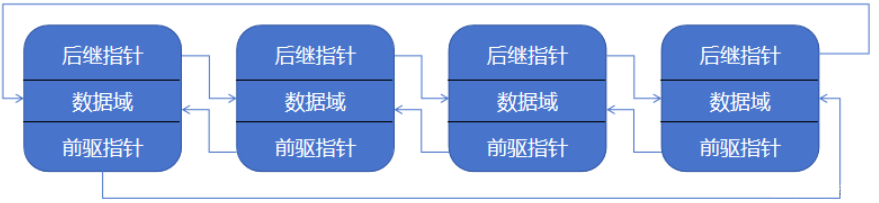
内核链表本质就是一个双向循环链表:
链表的实现仅用一个include/linux/list.h实现。
内核链表有别于传统链表就在节点本身不包含数据域,只包含指针域。故而可以很灵活的拓展数据结构。使用时包含在用户数据结构内部。
1.1 内核链表结构体#
1 | struct list_head { |
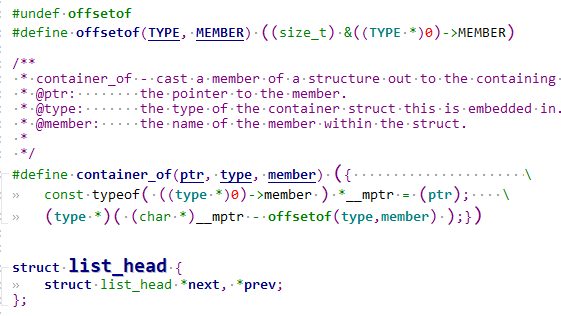
这里把内核经典的container_of和offsetof实现也贴进来了。实际上一般使用container_of都用include\linux\kernel.h
1.2 list初始化#
1.2.1 用宏初始化-LIST_HEAD#
1 |

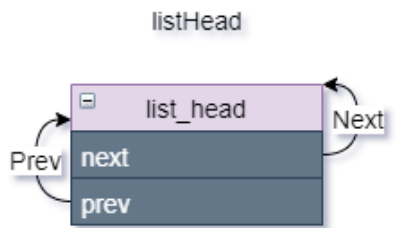
LIST_HEAD 定义一个list_head变量, 让next,和prev,也就是【前驱】和【后继】指针都指向自己,作为链表头指针。
例如:
1 | LIST_HEAD(list); // struct list_head list = {.next = list, .prev = list}; |
1.2.2 用接口初始化-INIT_LIST_HEAD#
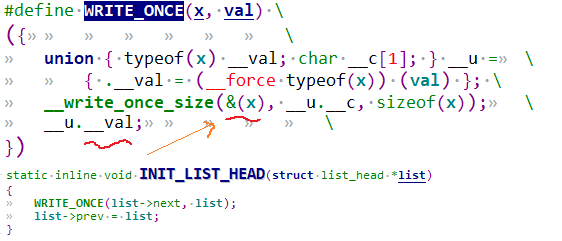
INIT_LIST_HEAD函数用来对一个list_head指针初始化。WRITE_ONCE是一种内存屏障机制,只写入一次, 防止并发产生竞态,参考Linux内核-并发与同步 | Hexo (fuzidage.github.io)
linux内核下并发时同步机制 - fuzidage - 博客园 (cnblogs.com)
因此INIT_LIST_HEAD等效于:
1 | static inline void INIT_LIST_HEAD(struct list_head *list) { |
例如:
1 | struct list_head list; |
1.2.3 初始化完后头部节点图例#
1.3 内核链表操作#
1.3.1 插入节点#
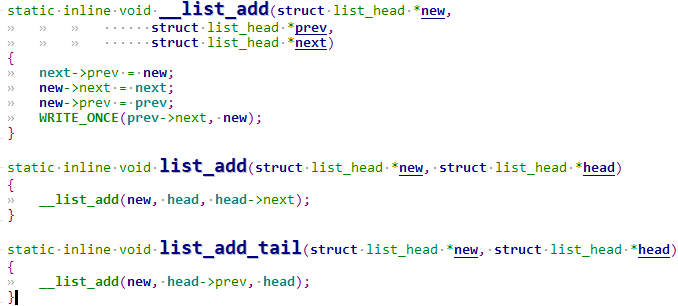
list_add总是在链表的头部插入, list_add_tail插在链表尾部。
1 | static inline void __list_add(struct list_head *new, |
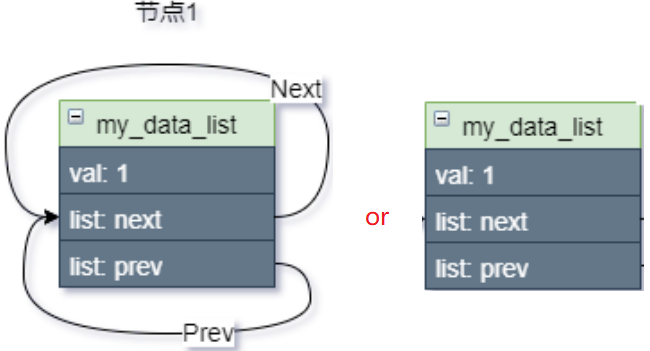
1.3.1.1 创建一个节点#
1 | struct my_data_list { |
1.3.1.2 头插节点-list_add#
list_add(&frist_data.node, &listHead);
list_add总是在链表的头部插入,先看插入第一个节点:
插入第一个节点,就是让list_head的next和prev都指向第一个节点,第一个节点的next和prev也都指向了list_head,构成一个单元素的环。
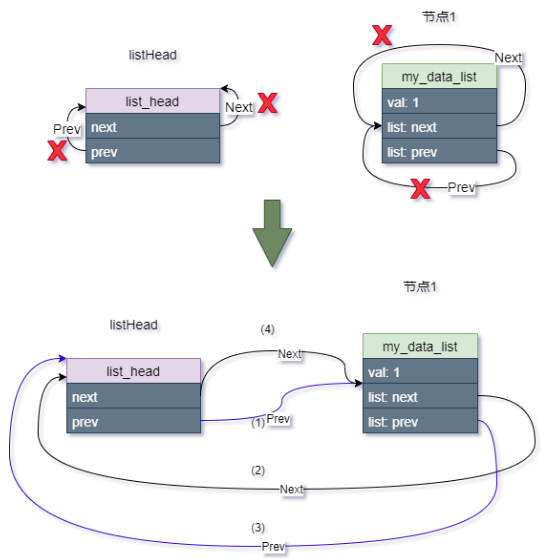
再插入第二个节点:
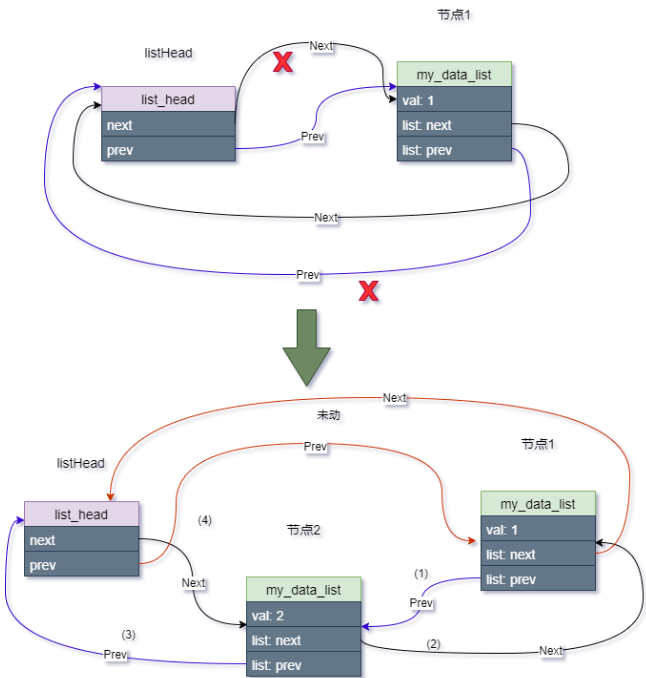
结合代码讲解:
1 | static inline void __list_add(struct list_head *new, |
①让节点1的prev指向节点2。
②让节点2的next指向节点1.
③让节点2的prev指向头节点。
④让头节点的next指向节点2。
1.3.1.2.1 头插入的要点总结#
总结1: head的next是指向链表中最新的节点,head的prev指向链表中最旧的节点。
总结2:list_add函数作为头插本质:
①把链表头的next剪掉,next去指向新节点;但是得提前将旧节点的prev剪掉,旧节点prev也去指向新节点。注意为什么要先操作旧节点?因为旧节点就是head->next啊。
②让新节点前驱prev指向head, 后继next指向旧节点。
总结3:头插遍历总是先访问到最新的元素,类似于”栈stack“, ”先进后出“。
1.3.1.3 尾插节点-list_add_tail#
list_add_tail(&frist_data.node, &listHead);
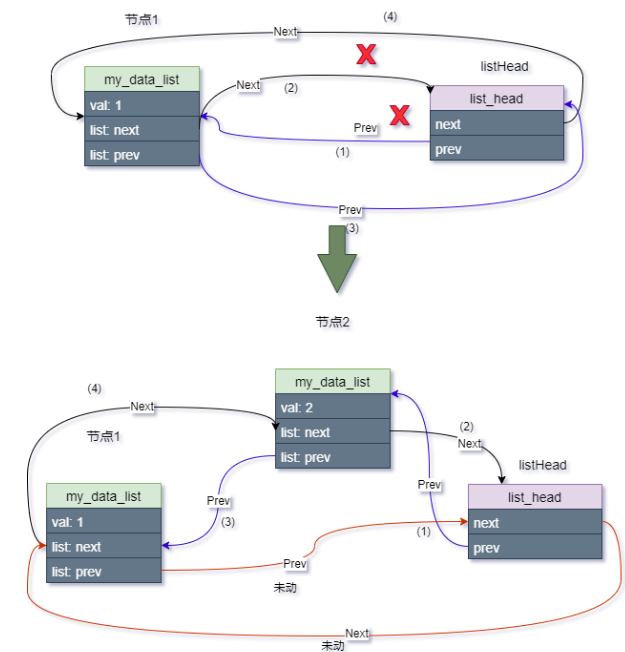

1 | static inline void __list_add(struct list_head *new, |
①头节点的prev指向节点2。
②让节点2的next指向头节点.
③让节点2的prev指向头节点的prev。
④让节点1的next指向节点2。
1.3.1.3.1 尾插入的要点总结#
总结1: head的next是指向链表中最旧的节点,head的prev指向链表中最新的节点。
总结2:list_add_tail函数作为尾插本质:
①先把链表头的prev剪掉,prev去指向新节点;最后把旧节点(尾节点)的next指向新节点。这样插入的就变成了新的尾节点。
②同时让新节点的next指向head, prev指向旧节点(尾节点)。
总结3:尾插遍历总是先访问到旧的元素,类似于”队列FIFO“, ”先进先出“。
1.3.2 删除节点-list_del#

1 | static inline void __list_del(struct list_head * prev, struct list_head * next) |
可以看到list_del和__list_del_entry没有本质区别,核心都是__list_del。举个例子比如:
1 | list_del(&frist_data.node); |
非常好理解就不画图了,就是将下一个节点的prev指向前一个节点,同时反过来也要将前一个节点的next指向下一个节点。这个节点不就删除掉了。
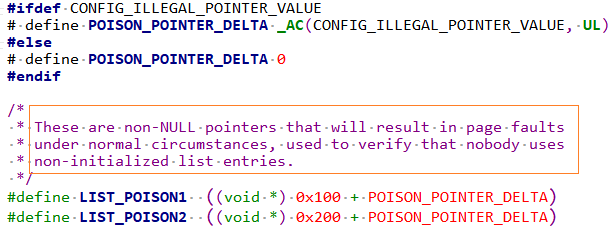
注意:摘掉的节点prev、next 指针分别被设为 LIST_POSITION2和LIST_POSITION1两个特殊值,这样设置是为了保证不在链表中的节点项不可访问–对LIST_POSITION1和LIST_POSITION2的访问都将引起页故障。一访问就会立马出错,这样保证了数据安全性。来看下LIST_POSITION1和LIST_POSITION2, 在include\linux\poison.h:
1.3.3 链表删除与反初始化-list_del_init#
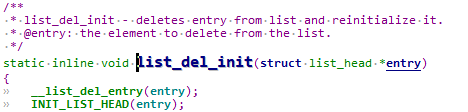
可以看到调用了__list_del_entry摘除自己这个节点,同时INIT_LIST_HEAD用接口初始化自己这个节点。
1.3.4 链表遍历#
1.3.4.0 list_entry#

遍历的关键就是这个list_entry 宏。它等效于container_of, 实现原理参考前面的讲解:
union和bit_field巧妙进行寄存器位操作 | Hexo (fuzidage.github.io)
union和bit field巧妙进行寄存器位操作 - fuzidage - 博客园 (cnblogs.com)
1.3.4.1 list_for_each(正向遍历)#
作用:传入头节点,去遍历里面的node
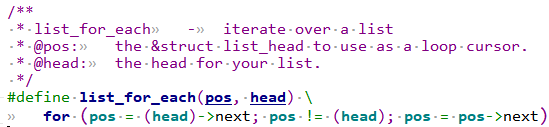
从head->next开始,也就是从第一个节点开始往后遍历,直到最后一个节点,这时pos就等于head了,循环结束。
1.3.4.1 list_for_each_safe#
下面这个list_for_each_safe, 多了一个tmp变量而已,提前用n去试探下一节点,安全情况下才赋给pos.

1.3.4.2 list_for_each_entry#
作用:传入头节点,去遍历里面的node所对应的外层宿主结构体。举个例子比较好理解:
1 | struct xxx_dev { |
首先定义一个链表job_list藏在xxx_dev里面,然后链表的节点宿主是xxx_job。
list_add_tail将xxx_job的node即可加入xxx_dev的job_list。
list_for_each_entry即可根据xxx_job的node成员取出宿主结构。
来分析一下list_for_each_entry函数:
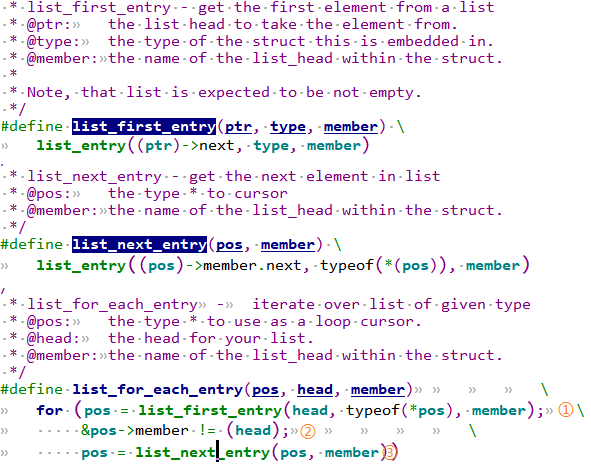
list_for_each_entry(job_tmp, &dev->job_list, node)那么首先进入for循环:
①代入list_first_entry(&dev->job_list, typeof(*job_tmp), node)
继续代入:看到了熟悉的list_entry(&dev->job_list->next, typeof(*job_tmp), node),是不是就是对应第一个节点的宿主结构xxx_job地址。
那么pos(也就是job_tmp)就指向了第一个节点的宿主结构。
②判断node是否达到head(也就是看有没有遍历到最后一个节点)
③此时pos已经是第一个节点的宿主结构,继续代入list_next_entry(第一个节点的宿主结构, node),看到了熟悉的list_entry(第一个节点的宿主结构->member->next, typeof(*job_tmp), node),这不就是下一个节点的宿主结构嘛,赋值给pos。
1.3.4.2 list_for_each_entry_safe#
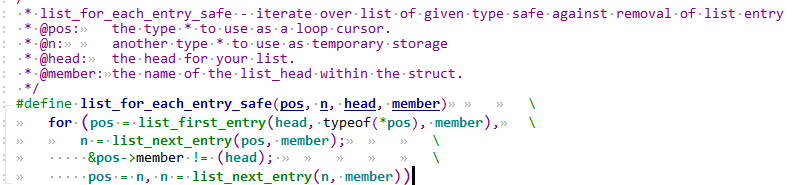
和前面的list_for_each_entry作用完全一样,可以看到实现也是基本一致。多了一个tmp变量而已,提前用n去试探下一节点,安全情况下才赋给pos.
1.3.4.3 list_for_each_prev(反向遍历)#
作用:传入头节点,反向去遍历里面的node
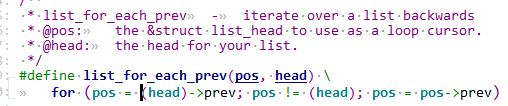
没什么好说的,和list_for_each相反方向遍历。
1.3.4.3 list_for_each_prev_safe#

1.3.4.4 list_for_each_entry_reverse#
作用:传入头节点,反向去遍历里面的node所对应的外层宿主结构体。和list_for_each_entry方向相反。

1.3.4.4 list_for_each_entry_safe_reverse#
和list_for_each_entry_reverse作用完全一样。

1.3.4.5 list_for_each_entry_continue/list_for_each_entry_from(从中间某个节点开始遍历)#

1.3.4.5 list_for_each_entry_continue_reverse(从中间某个节点开始反向遍历)#
1.3.5 判段链表是否为空#
1.3.5.1 list_empty#
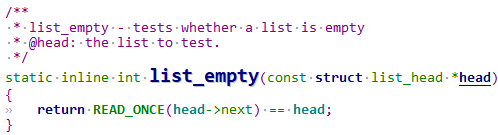
只要头节点的next还是自己,那就代表链表为空。
1.3.6 判段节点是否为最后一个节点#
1.3.6.1 list_is_last#
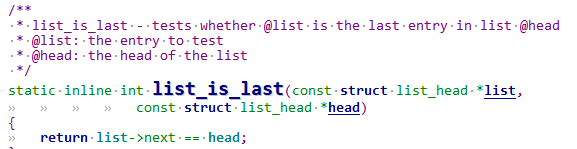
只要传入的节点的next为头节点,那就是最后一个节点。
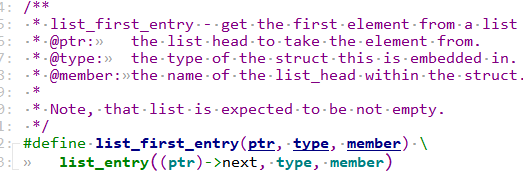
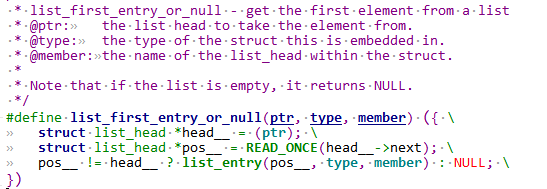
1.3.7 获取第一个节点的宿主结构#
1.3.7.1 list_first_entry/list_first_entry_or_null#
1 | struct xxx_job *job_tmp; |
前面1.3.4.2 list_for_each_entry小节其实已经分析过了,取出第一个节点的宿主结构指针。
下面这个list_first_entry_or_null多了一个判空,如果空链表,则会返回null。
1.3.8 获取最后一个节点的宿主结构#
1.3.8.1 list_last_entry/list_first_entry_or_null#
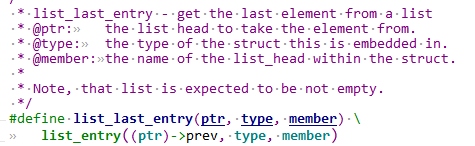
头节点的prev不就对应对应最后一个节点嘛。然后list_entry找到宿主结果。
1.3.9 获取上一个节点的宿主结构#
1.3.9.1 list_prev_entry#
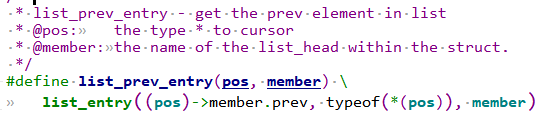
传入某个节点取prev不就是上一个节点嘛,然后list_entry找到宿主结果。
1.3.10 获取下一个节点的宿主结构#
1.3.10.1 list_next_entry#

传入某个节点取next不就是下一个节点嘛,然后list_entry找到宿主结果。
1.4 内核链表进阶操作#
1.4.1 节点从A链表转移到B链表#
1.4.1.1 搬移到新链表头-list_move#
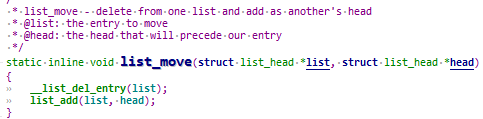
可以看到就是从旧链表摘除节点,再头插到新链表。
1.4.1.2 搬移到新链表尾-list_move_tail#
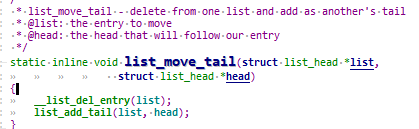
可以看到就是从旧链表摘除节点,再尾插到新链表。
1.4.2 链表A和链表B合并-list_splice#

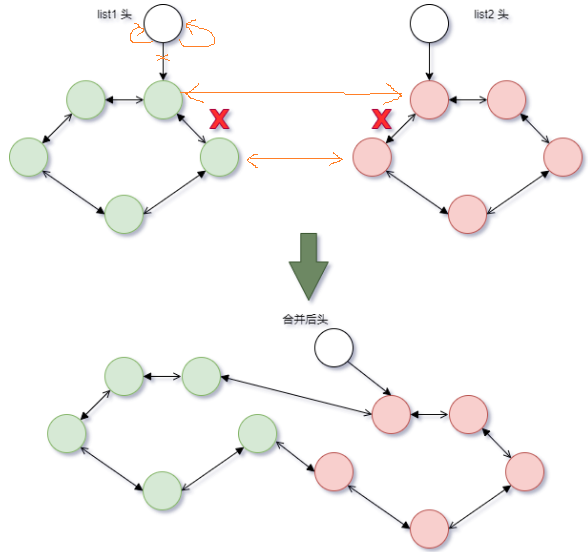
分析:list_splice(list1, list2);
带入:__list_splice(list1, list2, list2->next),那么:
1 | first = list1->next; |
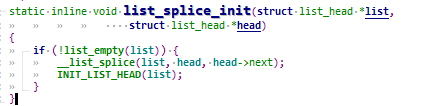
最后最好是将还要list1进行反初始化,这样list1才彻底和各个节点断链,比如list_splice_init函数:
1.4.3 节点的替换-list_replace#
list_replace:将新的节点替换到旧的节点上。
list_replace_init:将新的节点替换到旧的节点上。同时将旧的节点的prev和next指向自己,反初始化。
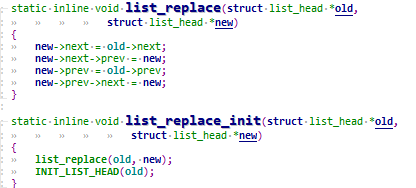
1 | static inline void list_replace(struct list_head *old, |
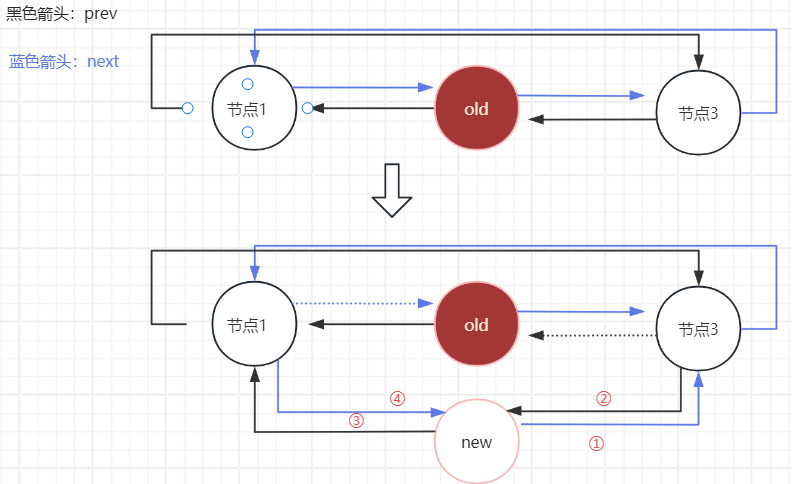
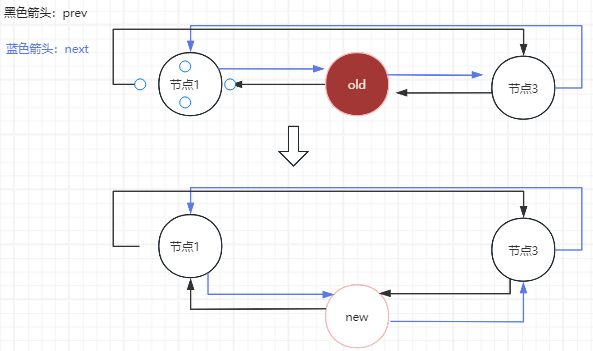
可以看到虽然替换成功了,但是old还是有指向关系,我们再对old进行INIT_LIST_HEAD(old);断掉old的指向关系,也就是对应list_replace_init函数:

old断链后图像那么最后就会变成:
2 内核链表总结#